The Germ of an Idea
In the late 1970’s, I moved into a house with a small garden. Having built indoor railways at various scales from Z to O, depending on the space available and the stability of my lifestyle, I decided that now was the time for a garden railway.
I was fascinated by the very occasional articles in "Railway Modeller" and other
modelling magazines, showing a new (to me) scale/gauge combination using 16mm to
the foot scale on 32mm gauge to represent 2 foot narrow gauge and immortalised by
Peco as SM32. It appeared that this would allow live steam to be successfully run
in your normal suburban garden. I found out about the 16mm Narrow Gauge Modellers'
Association, and read their journal, which was full of helpful advice, and decided
that it would be possible to model a typical British narrow-
The Planning Stage
It appeared that, in the past, the hobby required either engineering expertise or
deep pockets. The appearance of the Mamod train set suggested a way round this. There
were reasonably affordable add-
Steam, even with radio control, requires a circuit or a very long main line. To run
a circuit in my garden involving any straight track at all meant a minimum radius
of about four feet. I was brought up on PECO Streamline in all its manifestations,
so I ordered the requisite amount of Smerty-
Building and rebuilding
This is when my troubles started. The main problem, which hadn't occurred to me,
was that my garden was genuinely small. (I began to realise just how vague the term
was when I picked up a book "The Small Garden", which showed me how to plant up my
quarter-
The SM32 track arrived and I commenced bending it -
I laid the track down and ballasted it in the garden section and laid it on thin
battens in the patio section. It looked good for a week and then slowly straightened
in the horizontal plane and twisted in the vertical. Furthermore, what was intended
as a ruling curve of four feet was actually eighteen inch curves alternating with
straight track. The locomotive went into warp speed on the slightest down slope and
derailed within a yard. I won't distress you with the full horror of the year I spent
trying to get this to work. Let's just say it put me off running trains for the whole
of the next summer. Instead, I started building rolling stock, initially from Brandbright
kits, but later with scratch-
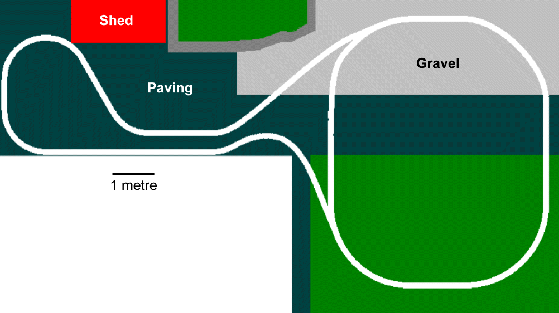
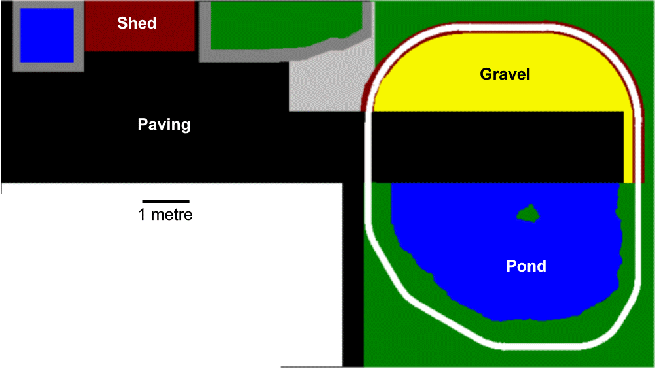
Eventually, I sat and thought about this and decided that what I was doing wrong was that I was using (or abusing) flexible track. When I visited the Chalk Pits Museum at Amberley I realised that the Mamod track with its 2'9 radius was more prototypical than I thought. For very light railways (such as peat railways, a local speciality in Somerset), sectional track with a very tight radius was used. In particular, "Jubilee" track was designed to be carried and laid by hand. Thus inspired, I relaid the line using Mamod sectional track on a foundation of treated wood. The tighter radius allowed me to create a dumbbell layout using the very limited space between the extension and the back window to allow continuous running.
This was much better for the battery-
More Problems
Radio control works well in a large open garden. In a small garden with one end surrounded by buildings, there was a major problem with "glitches" caused by the signal reflecting off metal within the buildings. In addition, the Mamod track acted as the worst kind of occasional conductor, so the locomotive was sometimes earthed, sometimes not.
Briefly, the result is very similar to the double images you'll occasionally see
on a television. In the radio-
I tried a Brandbright vertical-
So, what had I achieved? I had a relatively simple track layout which needed radio control to operate in any vaguely realistic way. I had a steam locomotive which was uncontrollable with or without radio control, and a couple od battery diesels. I had a fair selection of rolling stock, most of which had more or less survived the treatment it had received from the Mad Mamod.
If at first you don't succeed...
I came to the bitter conclusion that, if I couldn't make radio control work, then
I would have to rejig the layout for manual operation. This meant raised track -
I therefore decided to build an appropriately curved (four-
I un-
This was fairly successful but intensely boring. Simple tail-
... learn your lessons...
In the garden, the planning phase is vital.
Indoor flexible track, even when tightly curved, can be pinned into position without
being properly formed; outdoors; it goes where IT wants to go. Indoors, you can rip
down a hill and replace it with a valley in an afternoon; outdoors, you're looking
at a week's back-
...and give up
At this point, I pretty well gave up. I pulled up the track which was becoming overgrown with disuse; I confined myself to the very occasional evening repairing and building rolling stock and running this on the indoor circuit.
The new flower bed and pond looked nice, but it always reminded me that I'd been beaten, not an experience that I enjoy.
For images from this period see The PHLR Marks I & II -


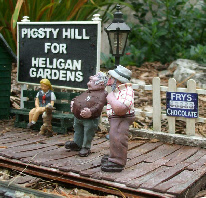
The Pigsty Hill Light Railway -
Early Days
Fitting a steam railway into a small garden
or
How to get it really, really, wrong